Showing posts with label snack. Show all posts

Saturday, May 4, 2013

Roasted Almonds

Nothing can beat some freshly warm roasted almonds. These are one addicting snack let me tell you. Once you try home roasted almonds, there is no turning back to store bought almonds. I am not kidding either. They are just so amazing. 

Everyone has heard at least once that almonds are very healthy for you. Well, yes they are. However, if eaten raw, they are very hard on your digestive system. Thus, if you soak or roast them lightly, that will allow for easier digestion and also bring out the nutrients. To read more about his go to My New Roots.


If you would like to soak your almonds, place them in bowl or cup and cover them with water. Soak them for a minimum of 8 hours. I usually just soak them overnight. This will sprout the almonds bringing out the nutritional elements of almonds. Since they are sprouted and living, they will mold if not eaten that day. So if you desire to make large batches of sprouted almonds, dry them in your oven at 170F for about 2 hours or until crisp.
Roasting almonds brings out a delicious flavor that is not like raw almonds. Personally, I like them so much better, but only when I roast them myself. Store bought roasted almonds have a lot of added oils and salt. Also, they would not be lightly roasted, so the nutritional value may be lost. According to My New Roots, store bought "roasted" almonds are actually deep fried. Who would have know!? Thus, if you are to buy roasted almonds, make sure to get "dry roasted" almonds. I do recommend roasting your own still because they are absolutely amazing!!

Roasted Almonds

Ingredients:
2 cups raw almonds (or however much you would like to make)

Directions:
1. Preheat oven to 300F.
2. Place almonds on a baking sheet.
3. Bake in oven for 15-20 minutes or until slightly golden on the inside. If you like them more or less done, adjust the baking time to fit your preference.

Thursday, May 2, 2013

Graham Crackers

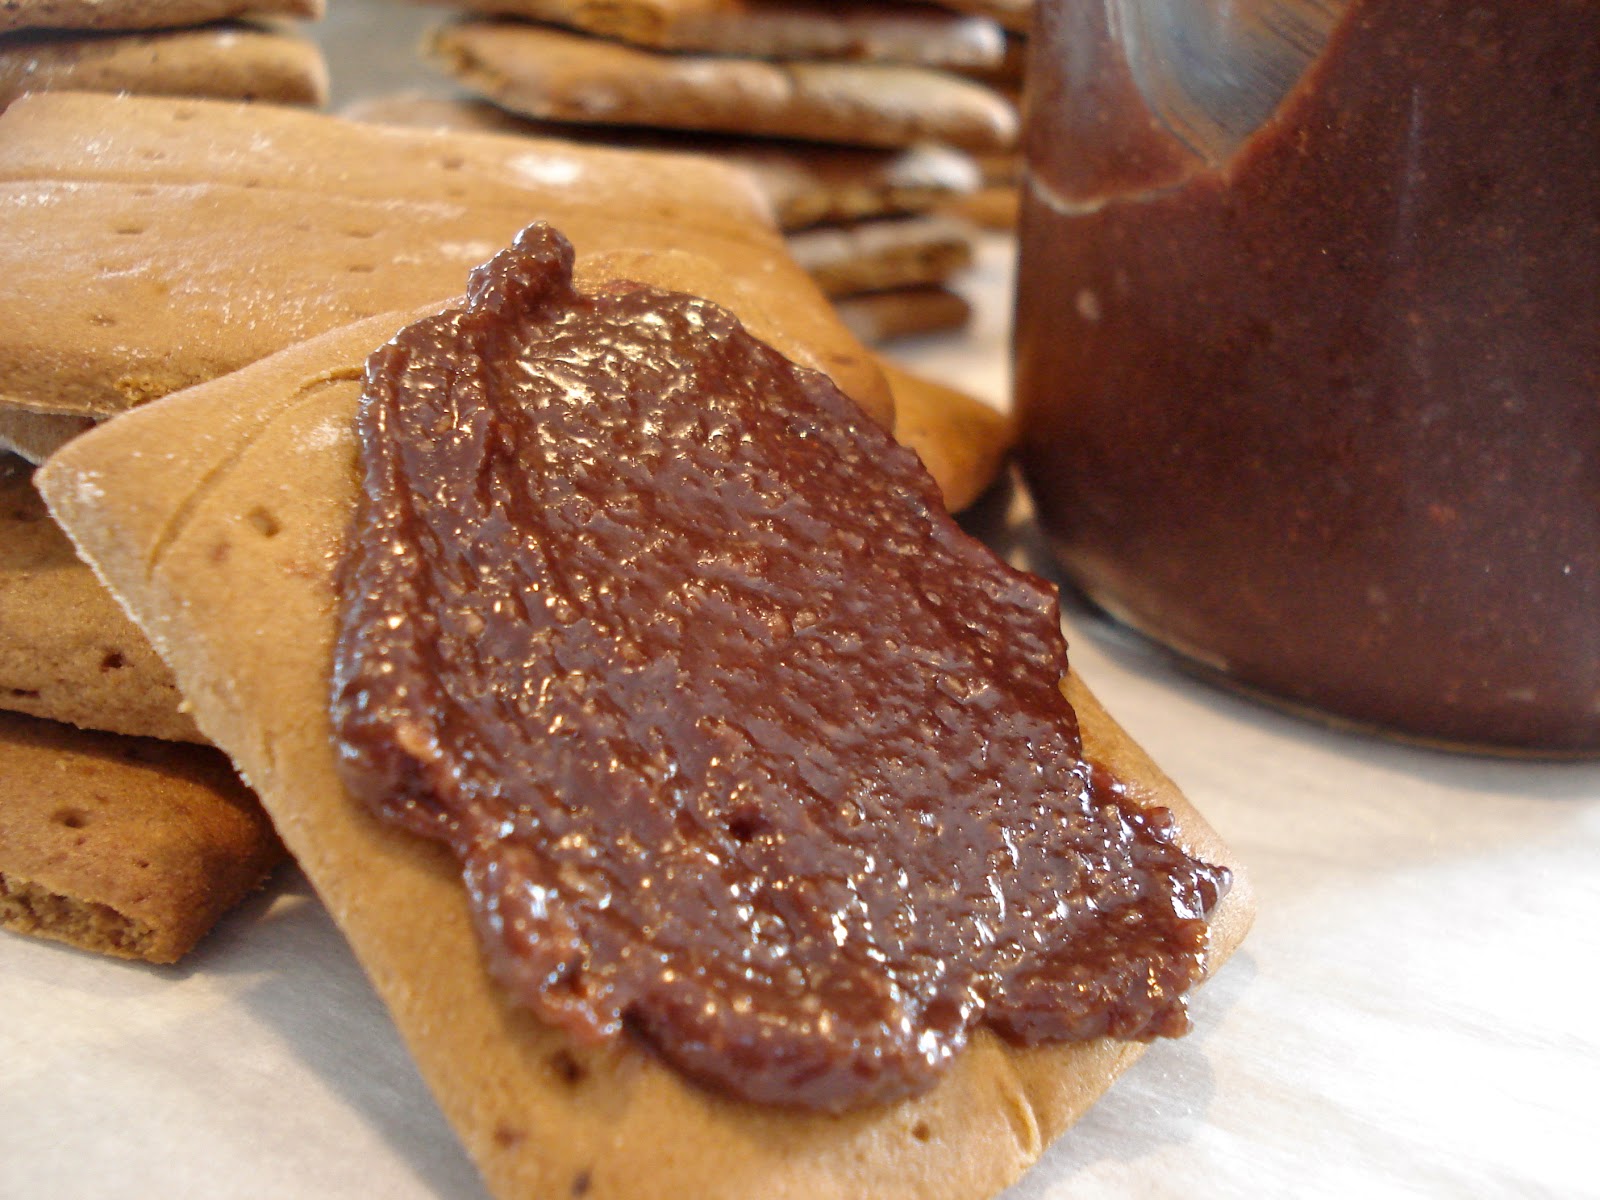
Graham crackers are a classic snack. They have been around forever! I always had them as a child, and I loved every bit I had of one. Whether they are eating in a s'more, with peanut butter, Nutella, or just dipped in milk, nothing can beat the classic graham cracker. I highly recommend you test these healthy crackers out. Honestly, they taste better...and I am not just saying that either. They even have the crunch!


I just made a batch of my Homemade Chocolate Hazelnut Spread last night. My sister was diligently studying for her Organic Chemistry test, and I decided I would make her a treat to help her along. She was one happy camper let me tell you. Since I cannot eat the ordinary graham crackers, I decided to venture on a journey of making ones I could eat.


These crackers are delicious, and surprisingly, not even bad for you! What do you know! Sounds like a perfect snack to me. They are definitely a crowd pleaser and super easy to make! My whole family loves them, and they make your house smell amazing non-the-less. Definitely try these amazing graham crackers!! You won't regret it!


Graham Crackers 
Adapted from Desserts With Benefits

Ingredients:
1 1/2 + 3/4 cup spelt flour, separated
1/2 cup coconut sugar
1tsp. cinnamon
1/4 tsp. sea salt
1/2 tsp. baking soda
2 Tbs. mollasses
2 Tbs. honey
2 Tbs. coconut oil
2 Tbs. unsweetened applesauce
1 tsp. vanilla
1 Tbs. almond milk

Directions:
1. Preheat oven to 375F. Line a large baking sheet with parchment paper.
2. Combine all dry ingredients (save 3/4 cup spelt flour for later) in a large bowl.
3. Whisk together wet ingredients until thoroughly mixed.
4. Add wet ingredients to dry ingredients. Stir until combine.
5. Add in the 3/4 cup spelt flour as needed to create a kneadable dough.
6.  Flour your rolling surface with remaining flour. Use a rolling pin to roll dough out until it is about 1/8" thick.
7. Cut crackers out to desired size with a pizza cutter. Use a spatula to transport the crackers to the baking sheet. Use a fork to poke holes in them.
8. Bake for 10-12 minutes or until the edges are slightly browned.
9. Let cool completely before storing in an air-tight container.

Friday, April 19, 2013

Bean and Veggie Salsa

Everyone loves a good salsa! Well let me tell you, this one is a good one. It is loaded with veggies and some beans. Great to get those vitamins in and protein too. It has been a hit at potlucks and when serving it to company. This salsa also reminds me of summer, so it was refreshing with the cold weather outside. 


This salsa became a staple food for grill nights in my house last summer. When we had burgers, we had this salsa. If we were having grilled barbecue chicken, turkey, or pork chops, you could always count on this being at the table. Just writing about this makes me excited to enjoy dinners on the patio again! It is a great addition to the dinner table. A wonderful side or snack that the whole family will love!


This salsa is very colorful as you can tell. As it is loaded with veggies, it is loaded with flavor! A definite must try. If you are using any frozen vegetables, I recommend thawing them fully before adding them into the salsa because otherwise it will get really watery. It still will get a watery because of all the vegetables, but it will help a lot to thaw them out before hand. Also, if you want to add some kick to it, add a jalapeño or a chili pepper. I am all for that! Just know what you are getting yourself into. I would not go too overboard with jalapeño peppers, or you may be living with a water bottle by your side for a few days. You can play around with different veggies and/or beans to fit best fit your taste preference. 


Bean and Veggie Salsa
Adapted from Soupbelly

Ingredients:
15 oz. can black beans, drained and rinsed throughly (or you could cook your own beans...highly recommend)
15 oz. can black-eyed peas, drained and rinsed throughly (again highly recommend cooking them yourself)
3 medium tomatoes, chopped and drained 
2 cups frozen corn kernels, thawed completely 
1/2 medium onion, chopped (white or red)
1/2 green bell pepper, finely chopped 
1/2 tsp. sea salt
3/4 cup chopped cilantro, more or less depending on desired taste
1 like, juiced 
Italian salad dressing*

*Italian Salad Dressing Recipe
1 Tbsp. garlic powder
1 Tbsp. onion powder
1 Tbsp. stevia 
2 Tbsp. dried oregano
1 tsp. ground black pepper 
1/4 tsp. dried thyme 
1 tsp. dired basil
1 Tbsp. dired (or fresh) parsley 
1 tsp. sea salt 
1/2 tsp. red pepper flakes 
2 Tbsp. red wine vinegar 
1/3 cup extra virgin olive oil 

Directions:
1. In a small bowl, mix all the ingredients for the dressing together. Set aside. 
2. Chop all the ingredients that require it and add in a large bowl. 
3. Add the remaining ingredients to the large bowl and stir until well combine.
4. Cool in the refrigerator for at least 20 before serving. 
5. Serve with chips (my favorite are these Blue Corn Chips). Enjoy! 

Thursday, April 18, 2013

Mango Cashew Sunshine Bites

It was raining earlier today, and now it is snowing. It's April...so slightly depressing. This just happened to be the perfect treat to brighten up the day. I took one bite, and it brought me back to the warm summer days. That lasted until I looked outside again, sadly. But for a moment I escaped to paradise. 


I was not quite sure what mango and lime would taste like together, but sure is delicious. I should never have questioned a recipe that Sarah Britton created. She has yet to fail me. If you need a good, healthy, and nutritious recipe, check out her website. All her ingredients are added for a reason and all contribute to the nutrition.


I have to say it was killer to wait as the cashews were soaking. So definitely find something to occupy your time while they soak. As for the ingredients, make sure the cashews that you use are raw and not roasted. Dried mangos are usually sulfured and sugared, so try to veer away from those and purchase the organic unsulfured mango pieces. Coconut also usually comes sweetened, which means added sugar. Organic unsweetened coconut can usually be found in any grocery store if they have a health food section. Otherwise, make a trip to my favorite place: the health food store!


These bite size tropical treats were a hit in my house. They have healthy wholesome ingredients, which makes them taste even better. The texture is very creamy...so good! Hope you enjoy these summer treats (even winter treats if you need a little summer joy).


Mango Cashew Sunshine Bites 
Recipe from My New Roots
Makes approximately 20-24 

Ingredients:
2/3 cup / 100g raw cashews
1 cup/ 100g dried mango pieces (purchase organic, unsweetened, unsulfured)
1/2 cup/ 50g unsweetened desiccated coconut, plus more for garnish
1-2 tsp. Creamed honey, for sweetness if desired
seeds of 1 vanilla bean (I used 1 tsp. vanilla)
lime zest (from 1 lime)
pinch sea salt
pinch ground turmeric (optional...I did not include this)

Directions:
1. Soak cashews for four hours. Drain and rinse.
2. Soak mango for 20-30 minutes until slightly softened, but not mushy.
3. In a food processor combine all ingredients except honey. Pulse to combine until a sticky dough is formed. Taste for sweetness and add honey if desired.
4. Spoon out about a 1/2 tablespoon amount of dough at a time and roll into a ball with your hands. Roll in coconut to coat. Store in the fridge for up to 2 weeks.

Thursday, April 11, 2013

Sweet Potato Fries: Two Versions

Who does not like sweet potato fries? If you have never tried them, you are truly missing out. They are fabulous! Of course, homemade baked sweet potato fries are my favorite. Sure you can get the greasy fried sweet potato fries, but why when these are so delicious, healthy, and easy to make!  


Sweet potato fries are great for a side with burgers, maybe a lunch, or even a midnight snack! Every time I have these they hit the spot! The recipes that I use is very easy to change up. You can add more of a spice or less depending on your preference. Personally, I like them pretty spicy! I dip my sweet potato fries in Plain Greek Yogurt. It is a great combination, and it also helps tone down the spiciness. 


This time around I made two different kinds of sweet potato fries. I made my normal batch as well as Sarah Britton's version. I still am not sure which one I like best. They are both very delicious. I recommend trying them both out and figuring out your preference. Also, play around with the spices to fit your preferred taste. 

            Sarah Britton's Crispy Cornmeal Sweet Potato Fries                                                   Original Sweet Potato Fries 
Crispy Cornmeal Sweet Potato Fries
Recipe from My New Roots
Serves 3-4

Ingredients:
2 – 3 large sweet potatoes
2 Tbsp. melted coconut oil or ghee
4 Tbsp. cornmeal / polenta
1 tsp. sea salt (more to taste, if desired)


Extra Flavor Add-ins:
garlic powder
ground cumin
smoked paprika
cayenne
black pepper
dried parsley

Directions:
1. Scrub the sweet potatoes well under running water. Slice them into long sticks 1cm thick (between ¼” and ½”). Place them in a bowl of water, swish around a few times, then drain (this step helps remove some of the starch from the potato). Place potatoes on a clean tea towel and dry thoroughly. Let them air dry while you prepare everything else.
2. Preheat the oven to 400°F/200°C. On low heat, melt coconut oil or ghee in a small saucepan. Place cut potatoes in a plastic bag, seal and shake bag vigorously to coat (this process can also be done on a cookie sheet, drizzle the oil over and toss very well to coat). Add cornmeal and salt to the bag and toss well to coat.
3. Place fries on a lined baking sheet, making sure that they are not overlapping. Bake for 30-40 minutes until golden brown and crisp.

Original Sweet Potato Fries 
Adapted from Recipe Collage

Ingredients:
2 Sweet Potatoes
½ tsp. Cayenne Pepper
½ tsp. Sea Salt
½ tsp. Garlic Powder
½ tsp. Cumin
½ tsp. Paprika
2 tsp. Olive Oil

Directions:
1. Preheat an oven to 400°F. 
2. Slice the potatoes in half lengthwise and then cut each half into four wedges. 
3. Toss the wedges in a bowl with the oil, cayenne pepper, paprika, cumin, garlic powder, and salt. 
4. Lay the pieces on a baking sheet. Bake for 35 to 45 minutes, until they’re browned on the outside and tender all the way through.

Serve with plain Greek Yogurt.